


Sites, bins and stock by location
Quick answer: With Bin locations on, you set up bins in Inventory → Locations, print bin labels, and Open Pantry tracks stock by bin. With Multiple sites on, each warehouse has its own stock and you move stock between them with transfers.
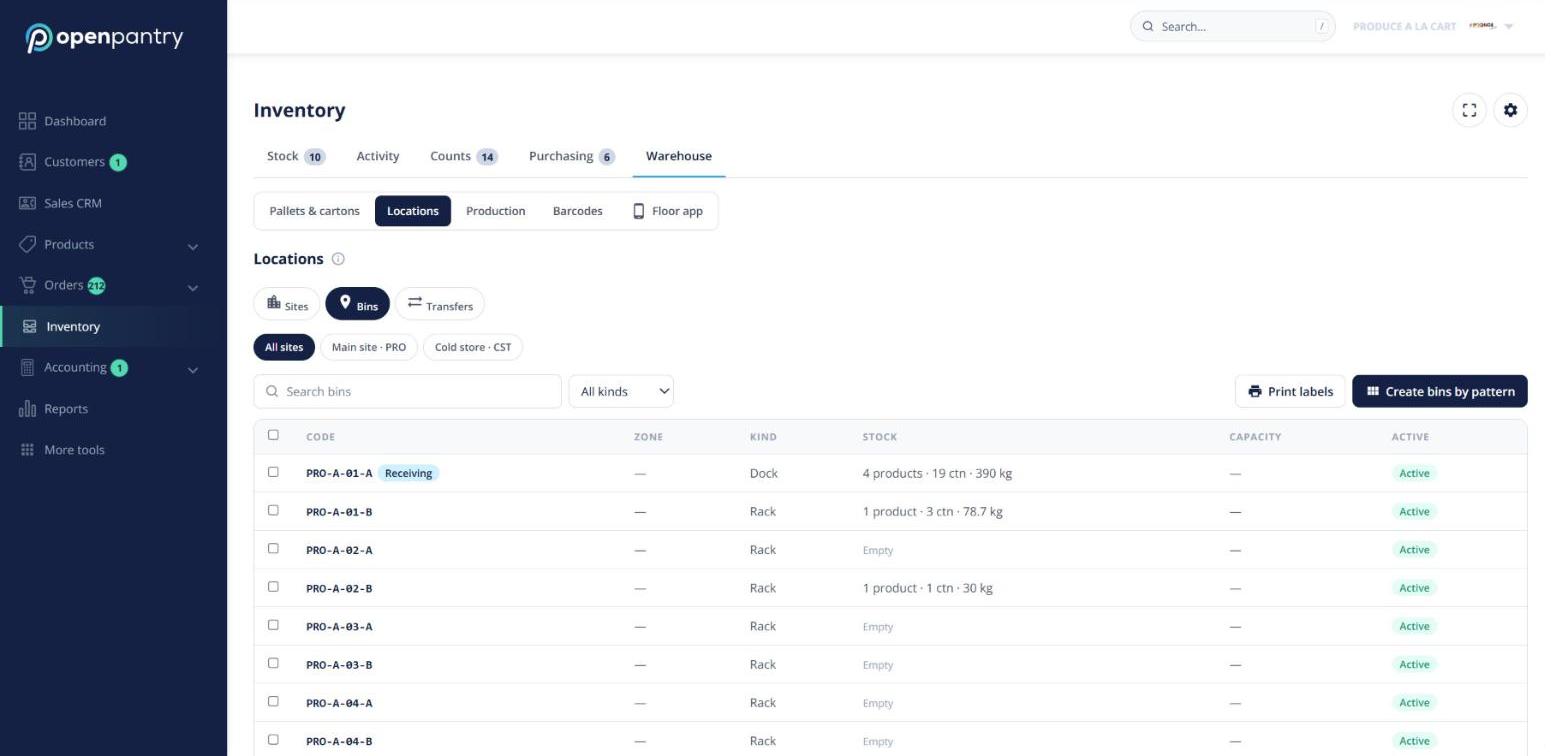
Create bins
- Go to Inventory → Locations.
- Add a site code, then add bins one at a time or by pattern (for example aisles A–D, bays 1–20). A dry run shows what will be created first.
- Print Code 128 bin labels on A6 or 100×50 labels, up to 500 per print.
Each product can have a default bin and a stock measure: count, weight, or both (for example “42 ctn · 912.4 kg”).
Put away and move
On the Floor app choose Put away / Move, scan the pallet, carton or product, then scan the bin. Open Pantry shows where it is now and suggests a bin. Scan several, then one bin moves a batch at once.
Transfers between sites
On the Floor app choose Transfer → Send and scan pallets onto today’s shuttle for that route, then Send. Stock is shown as in transit. At the other end choose Receive and scan them off; anything short shows red and anything extra shows amber. In the office, Inventory → Locations → Transfers lists every transfer, and short lines can be marked Found it or written off.
Counting by bin
On the Floor app choose Count, scan a bin, then scan what’s there. Each item shows Found, Not found, Unexpected here or Unknown. Counting works offline and syncs when you’re back online; the office reviews and posts the count. Desktop stock takes can also be scoped to a zone or bin range.
On the picker
Pickers see a bin chip on each line and cards ordered by walk order, so they walk the warehouse once.